Tuesday, October 18, 2022

How to Hide Kubernetes and System Containers in Docker Desktop


Containers have been around in kitchens and shipping docks for a long time. But in the software world, containers have taken over just recently through technologies like Docker and PodMan.

What is a Docker Container?

A Container is a basic package "containing" everything needed to run specific software or a more extensive software system component. Docker is the technology used to create containers. Taking care of your Docker containers is easy when their count is negligible. But in the case of large software systems, the number of containers can swell real quick. Kubernetes is the technology used to manage your container sprawl. There are other technologies, but Kubernetes comes built-in with Docker Desktop. This article is written using Docker Desktop for Windows. You can download the Docker Desktop from this link. This article is not concerned with the Docker Desktop settings file.

Docker itself is built using containers. It uses containers to take care of its internal operation.

Kubernetes on Docker Desktop

When we install Docker Desktop, Kubernetes is not enabled by default. You can install and enable Kubernetes later. Kubernetes is the king of container orchestration technologies. Having Kubernetes installed with Docker Desktop means you don't need to install tools like MiniKube.

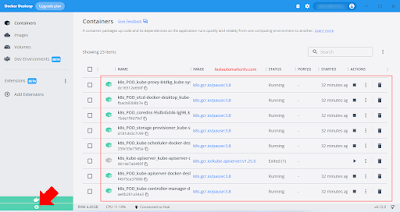
One day, you may open Docker Desktop, and a terrifying list of containers will greet you on the Containers screen. 

Docker Desktop Kubernetes Containers

Please take a look at the screenshot shown above. You can see the list of Kubernetes containers in a red box. An arrow is added on the bottom left of the same screenshot, and the vast green tile contains a tiny Kubernetes icon. It is easy to miss for newbies, and there is room for UX improvement in Docker Desktop.

How to optimize the number of containers shown by Docker Desktop UI

The list of containers displayed by the Docker Desktop contains the containers used by the Docker system to keep the "lights on." These containers are called system containers. The name of Docker system containers is hard to remember for humans, at least in the current Docker Desktop version. You may not enjoy seeing them again and again. It is possible to hide the system containers through Docker desktop settings. 

The Docker Desktop settings can be opened through an icon on the top right corner of the Docker window. 

Docker Desktop Settings Icon
The Docker Desktop Settings icon is shown above. The Docker Settings icon could've been slightly more prominent, and the tiny bug nearby makes it less visible. Clicking it is going to lead us to the Docker Settings UI.
Show system containers - Docker Desktop

The Kubernetes settings are hidden in a tab on the Docker Desktop settings UI. By default, you can see the option "Show system containers (advanced)" is enabled. This tiny checkbox contributes to the long list of items from where we started the chase. It is time to uncheck the setting "Show system containers (advanced)" and click the button "Apply & Restart." The apply button is below the settings UI, towards the right side.

Settings Docker Desktop


The screenshot above shows the Docker Desktop (for Windows) settings after unchecking the option "Show system containers (advanced)." Clicking the "Apply & Restart" button will not do much on the surface but will change the relevant settings behind the scenes. You must close the Docker Desktop window and reopen it to see the results.
 
Docker Desktop No System Containers


The screenshot above shows how the Docker Desktop for Windows. The containers UI section will look when the system containers are not displayed.

Conclusion:
It is straightforward to enable/disable whether you want to see the Docker system containers. The number can be large, and most of the time, you don't need to look at the list all the time. My personal preference is to hide the system containers from Docker settings. I'll be writing more about containerization and Docker in the future. Please stay tuned. Please do share your feedback about the post as well. It is most welcome.


Monday, June 20, 2022

How to Copy data from PowerShell Commandline to Clipboard

I discovered that we can copy the results of a DOS/PowerShell command directly to the Windows Clipboard. It is possible to use the pipe operator for this purpose.

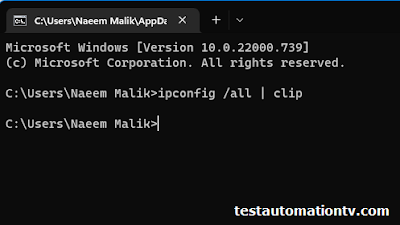
How to copy ipconfig data to clipboard PowerShell command

ipconfig /all | clip

Copy from commandline ipconfig to clipboard


The pipe-sign will pipe the output of the ipconfig command over to the clipboard, from where you can paste it into any text editor you choose, such as Notepad, Notepad++, or VS Code.

How to copy present working directory console output to the clipboard using Windows PowerShell

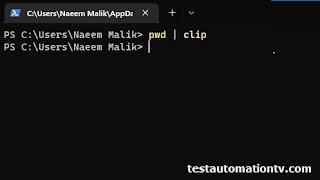
You can use this technique in combination with various commands, including the PWD(Present Working Directory) command i.e.

pwd | clip

Copy present working directory to clipboard from PowerShell commandline


If you want to copy some random text over to the clipboard, it is also possible.

How to copy random text to clipboard using PowerShell

echo "Copy this" | clip

Copy any text co clipboard from cmd or Windows PowerShell


How to clear Windows clipboard from PowerShell command

If you want to clear the clipboard, you can pass an empty string through the echo using the following syntax:

echo "" | clip

Clear clipboard Windows Powershell Commandline command


Another PowerShell command to clear the clip is also given below: 

echo $null | clip


You may also use the PowerShell method Get-Clipboard and Set-Clipboard in some scenarios, although I need to figure out the specific scenarios.

Sometimes, you may use the stream redirection operation for the same purpose. 

I hope you'll find this tech tip blog post useful. Feel free to share if you, too, know anything cool.

And just an "oh, by the way," I also learned about the Get-Content command today, which can be used to print the contents of a text file to the console. It has got some other sophisticated uses too. But the simplest one I've found so far is a replacement of the Linux cat command(also available in PowerShell). 


How to copy the contents of a file without opening it on Windows using PowerShell

Suppose you're on a Windows machine and want to copy the contents of a text file without opening it. Is it possible? Let me show you how to copy the contents of a file to the Windows clipboard using PowerShell.

First of all, you can use the following command to read the contents of a file:
cat

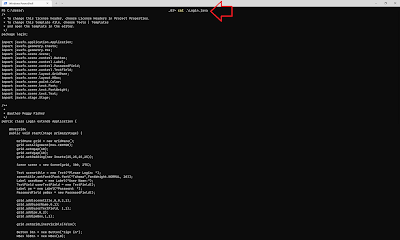
The cat command comes from Linux, widely used in the Linux world to print the contents of a file.

PowerShell Cat Command copy to clipboard

The above image shows how you can print the contents of a file on the screen using PowerShell.

Quick Tip:

If the folder is opened in Windows File Explorer, click on the path textbox and enter the word.  


PowerShell to launch PowerShell in the same folder.


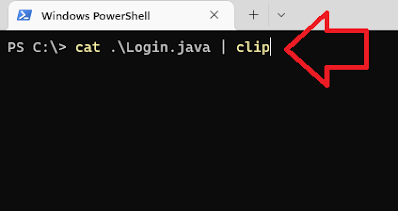
You can easily pipe the results of the cat command over to the clip object representing Windows Clipboard. An example is shown below:

cat .\Login.java | clip


cat text contents of file to clip powershell command windows


All in all, I showed you the following three commands in this short blog post: 


ipconfig /all | clip

pwd | clip

echo "" | clip

cat <file-name> | clip