Monday, August 16, 2021

Robot Framework with VS Code and RF Language Server

 Installing Visual Studio Code and Robot Framework Language Server 

VS Code, Robot Framework, and Python/Pip installation for test automation


Udemy Course: Playwright TypeScript Automation Testing


Robot scripts are plain text files.

You can create and edit Robot Framework scripts in any text editor like Notepad, but you might make small mistakes that could be hard to catch. Proper tools are also available to make your life easier. 

These tools are helpful especially when you’re starting afresh. 

One such tool is Visual Studio Code. VS Code is available for many platforms including Windows, Linux, and Mac.

An alternative is IntelliJ PyCharm IDE but in this tutorial, I will to show you how to setup VS Code for creating Robot Framework automation scripts. 

I’ll launch the browser and download Visual Studio Code


Let’s install it. You'll need to agree to the terms and conditions.

We'll select all options on “Select Additional Tasks”  and click Next then click Install.

I’ll checked the “Launch Visual Studio Code” option and click Finish


Visual Studio Code will open after you click the finish button.

How to Install Robot Framework Language Extension

Maximize the VS Code window and click the Extensions icon on the left side.


Search for “Robot Framework Language Server Extensions” and install it


After this search for “Python” in plugins and install the one from Microsoft. 


When the installation is finished, we’ll be good to start work with Robot Framework but there is one small pre-requisite we still have to download to run automation.

I'll show that to you in my next article.

Stay tuned. If you have any questions, please feel free to ask.

All articles in the Robot Framework Test Automation series


  1. Introduction to Robot Framework, Test Automation, and RPA Tool
  2. Installing RobotFramework, RobotFrameworkSelenium, Python on your PC & updating Pip
  3. Robot Framework with VS Code and RF Language Server
  4. The role of browser driver in test automation and downloading Google ChromeDriver to use with Selenium and Robot Framework

Thursday, August 12, 2021

Installing RobotFramework, RobotFrameworkSelenium, Python on your PC & updating Pip

 Installing Python to run Robot Framework

The Robot Framework is built using Python programming language. To use Robot Framework, you don’t need to know Python. But, you still need to have it installed on the machine where you want to develop Robot framework automation scripts or run them. 

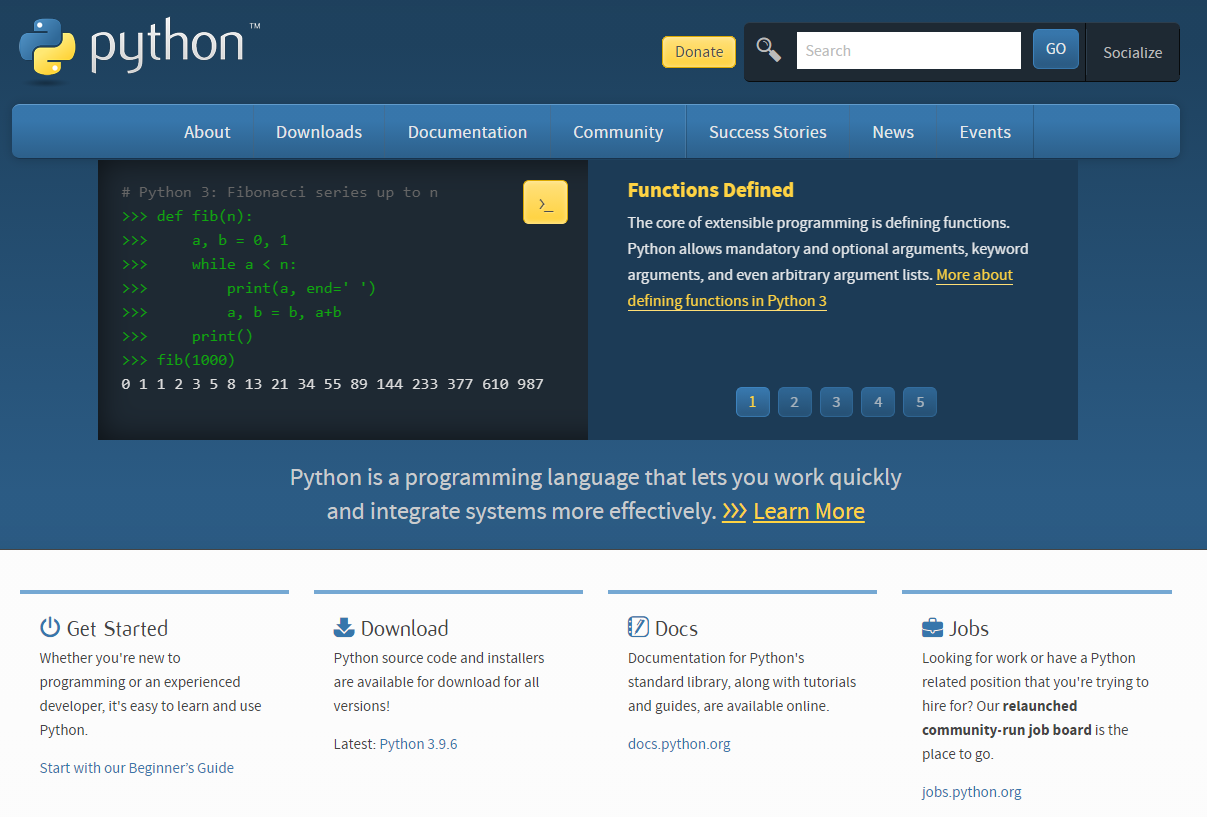
Let’s download and install the latest version of Python by visiting python.org.


Python.org - download Python

We’ll download the latest version. 

Hover the mouse over the "Downloads" menu item and select the latest version for Windows.


Many versions for a variety of platforms are available here(on Python's website). 

You can download using any browser be it Edge or Chrome.  

I planned to teach how to perform automation using Google Chrome in the course for which I wrote this material and thought to install Chrome plus the Chrome Driver later on. 

Now open the installer file. 

Do remember to click the checkbox “Add Python x.y to PATH”


It is important to note down the path where you’ve installed Python. 

Click customize installation

Click next

I am not changing anything but I just wanted you to see what are the options available. 

Click next again and click install

Once the installation is finished, I’ll click close. 

Now let’s check through Windows Powershell if we can run python from there or not. 

Having python installed correctly is necessary for running Robot Framework automation. 

I’ll click the windows button and type Powershell. I’ll click it to open it. 

Windows 10 Opening Windows Powershell


Over here, I’ll type Python space -version command to find Python version and press enter. 

Python -version 

You can see that the currently installed version. 


How to update Python Package Manager Pip

Updating Pip is a small but important detail. It is an integral part of the Python echo system but the latest version doesn’t come bundled with the setup for some reason. 

Pip is the default package manager software that comes bundled with the Python programming language. 

We are going to use Pip to install the robot framework library in our Python setup. 

It is a command-line based tool

We are going to use a command to find the current version of pip installed on our PC and whether it’s the latest and greatest or not. 

I’ll open the PowerShell

I will type the command and hit enter

pip list


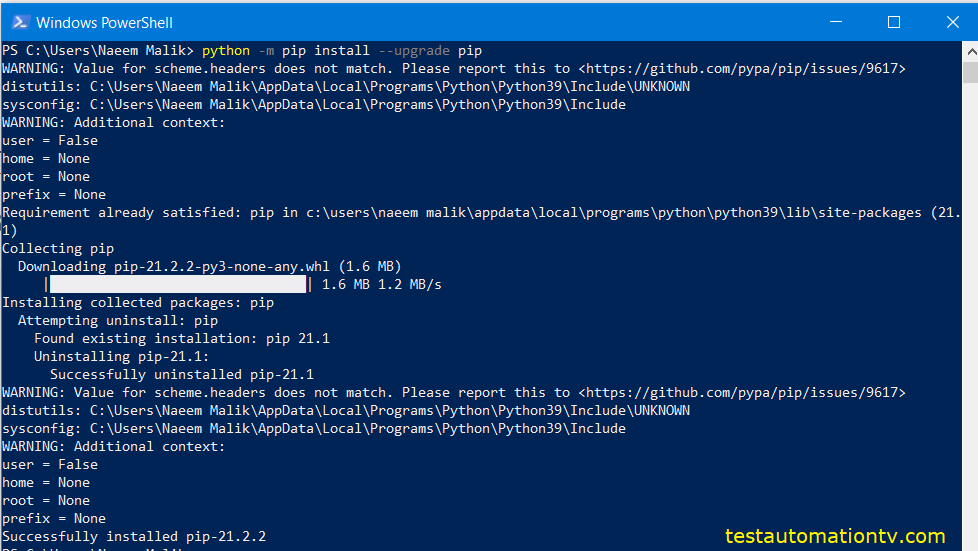
The command which is used to upgrade pip is also shown below. I’m going to type it and hit enter. 

Python -m pip install --upgrade pip

The example shows the full path of python installation but I’m using just the word Python, because we’ve added this path to our system’s path variable. 


An upgrade(of Python pip) will be downloaded and installed for you, it is a small package. 

If it gets stuck here, hit enter a few times and you’ll be done. 


Installing RobotFramework and RobotFrameworkSelenium on your PC

After installing Python and upgrading the Pip package manager, we are going to install the Robot Framework using PowerShell. 

The command is very simple, let’s type it in and press enter

Pip install robotframework

Once the command has been successfully executed, the Python installed on your PC will have all the components of Robot Framework available locally. 

Important

For performing browser automation with Selenium, we must install the robotframework-Selenium library 

Let’s do it. 

Pip install robotframework-seleniumlibrary

Once the installation is finished, we’re good to run Robot Framework scripts on this machine. 

In the next blog(and upcoming video) I'll show you how to install tools in Visual Studio Code to create Robot Framework scripts. 

All articles in the Robot Framework test automation series


  1. Introduction to Robot Framework, Test Automation, and RPA Tool
  2. Installing RobotFramework, RobotFrameworkSelenium, Python on your PC & updating Pip
  3. Robot Framework with VS Code and RF Language Server
  4. The role of browser driver in test automation and downloading Google ChromeDriver to use with Selenium and Robot Framework

Monday, April 19, 2021

Introduction to Robot Framework, Test Automation and RPA Tool

What is Robot Framework

Robot Framework is a test automation framework. Robot Framework is a keyword-driven automation framework. It is written in Python but you can use it without knowing the language. Robot Framework is also known as RF.


Keywords in Robot Framework

To create automation scripts using Robot Framework, we utilize certain predefined keywords.

Some examples of keywords are

  • Click Button
  • Wait Until Element is Visible
  • And
  • Input Text


All of these keywords take parameters that are used to control their behavior.

For example, the keyword Click Button and the keyword Wait Until Element is Visible of Selenium Library allow us to supply the information about the button we want to click and the element we want to wait for. 


The Input text keyword lets us specify two things:

1. where we want to input text

2. what text do we want to input.


Many keyword libraries for Robot Framework are available. You can test almost any system using Robot Framework libraries. 


The numerous versatile libraries are the real superpower of Robot Framework. It is possible to create complete test automation and quality assurance solutions with Robot Framework. 


Advantages of Robot Framework

Robot Framework is Python-based, but unlike many other automation tools, you don’t need to take a programming course before you start to learn Robot Framework.

The requirement to learn a programming language such as Python, Java, or C# is the first barrier of entry for many QA professionals who want to learn test automation. Python Framework liberates you from this prerequisite.


We can use multiple IDEs to write Robot Framework tests. 

For example, IntelliJ PyCharm IDE, Microsoft Visual Studio Code IDE, and the open-source Robot IDE or RIDE. 

On an interesting side note, Robot Framework can also be used in a Java-based ecosystem through Jython and in .Net through IronPython.

Robot Framework can also be used for Robotic Process Automation(RPA). 


Where You Shouldn't Use Robot Framework

Robot Framework is not a record and playback-based test automation tool. It is more like  Lego for test automation. Many ready-made pieces are available for you to combine and make your own masterpiece.


The first version of Robot Framework was launched in 2005. Robot Framework has very strong community support. The Slack channel RobotFramework is very active.

Robot Framework version 7.1.1, which was released on October 19, 2024..

A lot of libraries are available to be used with Robot Framework.


Popular Robot Framework Libraries

A list of popular robot framework libraries is given below:

  • Selenium Library
  • Appium Library
  • Request
  • Soap Library
  • Database Library
  • Browser Library
  • Archive Library


Robot Framework is an easy-to-use, versatile, and extensive tool. It has survived the test of time and it is here to stay.


Let us proceed toward installing the tools needed to start using Robot Framework. 


All articles in the Robot Framework Series


  1. Introduction to Robot Framework, Test Automation, and RPA Tool
  2. Installing RobotFramework, RobotFrameworkSelenium, Python on your PC & updating Pip
  3. Robot Framework with VS Code and RF Language Server
  4. The role of browser driver in test automation and downloading Google ChromeDriver to use with Selenium and Robot Framework

Friday, May 15, 2020

WinAppDriver Tutorial: Using Appium Client For Object Inspection in Windows Desktop Test Automation

Appium Server Windows with Free Test Automation Tool WinAppDriver Object Inspector


Download free e-book Windows Test Automation With Appium Windows Application Driver in C# .Net


Introduction to Appium Desktop Client


When I created my Udemy Course about WinAppDriverUI Automation Testing in 2019, I relied solely on the WinAppDriver UI Recorder to inspect various Windows application elements. I showed how to automate. Only a little information was available on the subject back then. I recently came across another tool we can use to look into various application elements and find their attributes for UI test automation.

This article shows you just that because it has the potential to make your life easier. I've also added the same videos to my Udemy course and YouTube channel. This tool is called the Appium Desktop.  

This post will serve as an introductory WinAppDriver tutorial. I am going to show you how to use an alternative of
WinAppDriver UI Recorder.
You can download it from the Appium.io website. 

Before we proceed, please remember there are two prerequisites for using Appium Desktop. 
  1. Enable Windows 10 Developer Mode on your PC
  2. You need to have WinAppDriver 1.1 or above installed on your PC. 


    You don't need to install Node.js to run an Appium desktop client, as shown in this WinAppDriver tutorial. Let me google the search term Appium Desktop client quickly and guide you. You also don't need to download WinAppDriver UI Recorder.

    Download Appium Desktop on Windows

    This will take us to the GitHub repository of the Appium Desktop project. You will need to download the Appium-windows.exe from here and use it to install an Appium desktop.

    Please see the screenshot below.


    Appium Desktop Download Items
    Once you've got Appium Desktop installed, you can proceed further. We are going to start using Appium Desktop for inspecting Windows Applications. If you have the proper tools installed, please note that you can use the same utility to check apps on other Appium-supported platforms, such as Android and iOS. Although that's beyond the scope of this blog.


    Running Appium Desktop Client and Connecting to a Windows Application


    Before we use the Appium Desktop Client to inspect the elements of a Windows application's features, we must start the Windows Application Driver through WinAppDriver.exe. 


    Learn WinAppDriver Automation Testing Free Tools

    Now let's run the Appium Desktop Client; you can find it in your Windows applications. First, click the "Start" button and type Appium. 


    Appium Client in Windows Apps List

    Now click the "Appium" icon to open the application. The Appium desktop client can take a few seconds to load. Then, on the main Appium UI, go to the "File" menu and select "New Session Window." 

    Appium New Session on Windows

    A new dialog box will open up. The tab "Custom Server" will be selected. I'll leave the remote host and remote port fields unchanged. In the Remote Path field, I'm going to put a forward slash. Then there's this table-like Ui to specify Desired Capabilities. I will click on the first text box containing the "Name." I will type the word app in there. Please note the phrase app will be small. In the value textbox, I'll paste the user mode ID of the Microsoft Windows 10 Calculator app, which is:

    Microsoft.WindowsCalculator_8wekyb3d8bbwe!App


    I've shown how to find this value in my course. The final screenshot of the Appium custom server is shown below. FYI: 

    Setting AppiumOptions in Appium Client for Windows Automation Example


    Now Appium Client will connect the instance of WinAppDriver, which is running on this PC and listening on port number 4723. Remember, we started it earlier. I'll press the button "Start Session."

    Appium Client Inspecting Windows Calculator Example


    The calculator app will start, and you'll get a preview inside the Appium UI Recorder. You can hover the mouse on various application controls under the test, highlighted in yellow. In my case, the mouse cursor is also changing into a hand, but it was not captured in the screenshot.


    Appium UI inspector

    Let's end this section here, and we will learn more about the free Appium UI Inspector
    in the selection below. It is an essential tool for Appium-based automation.


    Inspecting Elements Using Appium Desktop Client and WinAppDriver For Automated Testing


    Once we have created a session in Appium Client, we can inspect various elements of the loaded application. The Appium Client object inspector UI is pretty simple. A button row is on the top, and "Select Elements" is clicked by default. 


    Appium Client Select Element Windows Automation
    1. We have the application preview loaded on the left side.
    2. "App Source" in the middle shows the hierarchy of application controls. 
    3. The rightmost panel is "Selected Element." It will populate when we click an element. 


    Appium Client Object Inspector Windows Selected Element


    For Example, we will hover the mouse on the application preview shown in the Appium Desktop Client. 


    You will see that the element under the cursor will highlight yellow. Let's click on button two in the application preview. You see, its color will change. In addition, you'll find tributes to this Windows Element will load in the right-hand pane. I've highlighted some properties/attributes (Name, AutomationId) that we can use for automation in the screenshot below.


    Windows WebElement Properties in Appium Client GUI Inspector

    The same thing will happen if we click the calculation results textbox on the top. 

    You can use the Appium desktop client to inspect Windows applications. However, other options on this screen could be more helpful. Instead, click on the given line to find out How to Download and Run WinAppDriver UI Recorder.

    Oxygen IDE Support: 


    Please note that you can record automated UI tests using Appium Desktop Inspector to run with Oxygen IDE. You'll need to have proper tools installed for that. This includes Android Studio, which is overhead, but so far, that's the way Oxygen IDE architecture is, and they don't have any plans to remove the dependency anytime soon. You can find more by visiting this link.

    You can now play with the inspector further to see more options. I am going to close it now. In the following video, I'll show you how to use the app arguments desired capability in Appium Desktop Client.

    app arguments Specifying Additional Desired Capabilities in
    Appium Desktop Client


    How to use appArguments AppiumOption/DesiredCapability in Appium? 

    We can specify more additional capabilities using the Appium Desktop Client. These capabilities can have various effects on our tests and are something not available in WinAppDriver UI Recorder. For Example, if we want to open Notepad with a file loaded into it already. Please note that you can't do the same thing in WinAppDriver UI Recorder software.

    Let us create a new session. In the app's default capability, I'll put "Notepad." Then I'll click the plus sign and add app arguments in the desired skills. Finally, I'll put the file's path we want to open in the value field.

    For Example, in my case, C:\Users\Naeem\Desktop\bunch of text.txt. Please note that we won't put double quotes around the path. The final screenshot of our new Appium client custom server to launch Windows 10 Notepad with a file opened inside of it is given below:


    How to configure Appium desktop client with WinAppDriver on Windows

    I'll click the "Start Session" button. You'll see that the file you specified as a parameter will open. 


    If you're doing Microsoft Excel automation, Microsoft Excel can use the same technique to open a file right out of the gates. You may need to test an Excel plugin with test automation using WinAppDriver(Free automation tool).


    Click on the link to find out "How to Download and Run WinAppDriver UI Recorder."
    It is also possible to open files in Microsoft Excel launched through WinAppDriver using appArguments Appium Option. 
    Specify the desired capabilities in your test automation code will be done through the method call listed below: 

    AppiumOptions.AddAdditionalCapability("appArguments", "c:\textfile.txt");
    AppiumOptions.AddAdditionalCapability("ms:waitForAppLaunch", "50");

    ms:waitForAppLaunch Handling Splash Screen in WinAppDriver


    How to wait for an application splash screen to display? For Example, how to use ms:waitForAppLaunch AppiumOption? 

    Some applications show a splash screen when they launch. Unfortunately, the splash is mistakenly considered the main application window by the WinAppDriver, leading to automation failure. 


    Microsoft Outlook Automation Testing with Appium WinAppDriver


    If you're using WinAppDriver 1.2 RC, you can also make the WinAppDriver wait a bit so that the splash goes away, and then the WinAppDriver attaches to the application window. 

    For Example, let's try a demo with Microsoft Outlook(2019), a Desktop e-mail client application. 

    A free code sample of Outlook 2019 automation using WinAppDriver can be found in your GitHub repository. I am going to launch it straightforwardly. Then, I'll create a new session window and put Outlook against the "app" in desired capabilities. 

    Now I'll click the "Start Session" button.


    Appium Client Object Inspector Loading Outlook for WinAppDriver Automation


    You'll see that the app preview will not load. The progress animation will keep spinning. Let's close the session window and come again. This time, I'm going to add a new Desired Capability. In the name field, I'll put ms:waitForAppLaunch in the value field, I'll put the number 15. 

    Now I'll click the "Start Session" button. 


    Windows Outlook Appium Client AppiumOptions Values

    This time, you'll see that the application preview will take a while to load in the Appium Desktop Client. This is because now you can check all Windows elements' properties inside this application. 
    Outlook Windows Mailing List Screenshot for Free Windows Automation Tool


    This is the end of this article, and I hope you found it helpful. Please feel free to ask questions.

    Do share it in your social circles as well. Please also visit my Udemy course; the link is given AppiumWinAppDriver UI Automation Testing.

    Hopefully, you found this lesson to be valuable. If you want me to write another WinAppDriver tutorial, just let me know. This article was updated in 2023.