Monday, June 20, 2022

How to Copy data from PowerShell Command-line to Clipboard Tutorial

Udemy Course: Playwright TypeScript Automation Testing

I discovered that we can copy the results of a PowerShell command directly to the Windows Clipboard. This tutorial post shows how to use the pipe operator for this purpose.

PowerShell Pipes and Plumbing


How to copy data from ipconfig to clipboard PowerShell command

ipconfig /all | clip
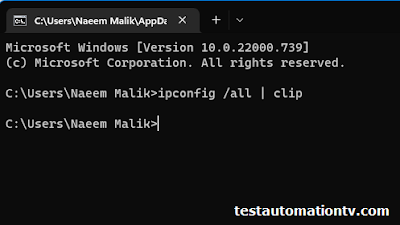
Copy from PowerShell ipconfig to clipboard Tutorial

PowerShell borrowed the pipe symbol from Unix. The Unix pipe symbol (|) is one of the most elegant innovations in computing history. Introduced by Douglas McIlroy at Bell Labs in 1973, it allows programs to chain together by directly feeding the output of one command into another. The simple vertical bar character was chosen for its visual suggestion of a pipeline carrying data.

The pipe revolutionized the Unix philosophy of creating small, focused tools that could be connected together - exemplified by classic combinations like `cat file.txt | grep "pattern"` or `ps aux | grep firefox`. Rather than building monolithic programs that try to do everything, developers created specialized utilities that worked together through pipes.

You can use the pipe with copy command and many more. The pipe helps you chain and automate your workflows. 

Would you like me to give more specific examples of how pipes are used in practice?

The pipe-sign will pipe the output of the ipconfig command over to the clipboard, from where you can paste it into any text editor you choose, such as Notepad, Notepad++, or VS Code.

How to copy present working directory console output to the clipboard using Windows PowerShell

You can use this technique in combination with various commands, including the PWD(Present Working Directory) command i.e.

pwd | clip
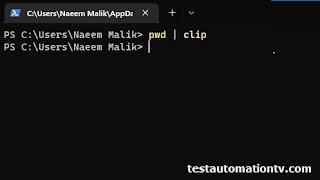
Copy present working directory to clipboard from PowerShell commandline


If you want to copy some random text over to the clipboard, it is also possible.

How to copy random text to clipboard using PowerShell

echo "Copy this" | clip

Copy any text co clipboard from cmd or Windows PowerShell


How to clear Windows Clipboard from PowerShell command

If you want to clear the clipboard, you can pass an empty string through the echo using the following syntax:

echo "" | clip

Clear clipboard Windows Powershell Commandline command


Another PowerShell command to clear the clip is also given below: 

echo $null | clip


You may also use the PowerShell method Get-Clipboard and Set-Clipboard in some scenarios, although I need to figure out the specific scenarios.

Sometimes, you may use the stream redirection operation for the same purpose. 

I hope you'll find this tech tip blog post useful. Feel free to share if you, too, know anything cool.

And just an "oh, by the way," I also learned about the Get-Content command today, which can be used to print the contents of a text file to the console. It has got some other sophisticated uses too. But the simplest one I've found so far is a replacement of the Linux cat command(also available in PowerShell). 


How to copy the contents of a file without opening it on Windows using PowerShell

Suppose you're on a Windows machine and want to copy the contents of a text file without opening it. Is it possible? Let me show you how to copy the contents of a file to the Windows clipboard using PowerShell.

First of all, you can use the following command to read the contents of a file:
cat

The cat command comes from Linux, widely used in the Linux world to print the contents of a file.

PowerShell Cat Command copy to clipboard

The above image shows how you can print the contents of a file on the screen using PowerShell.

Quick Tip:

If the folder is opened in Windows File Explorer, click on the path textbox and enter the word.  


PowerShell to launch PowerShell in the same folder.


You can easily pipe the results of the cat command over to the clip object representing Windows Clipboard. An example is shown below:

cat .\Login.java | clip


cat text contents of file to clip powershell command windows


All in all, I showed you the following three commands in this short blog post: 


ipconfig /all | clip

pwd | clip

echo "" | clip

cat <file-name> | clip

The difference between Windows Pipe and Unix Pipe

Although the Windows pipe and the Unix pipe look similar, they are very different under the hood. Unlike Unix pipes that simply pass text streams, PowerShell pipes pass entire objects between commands, which makes them more powerful for certain tasks. For example, you can access properties of objects directly in the pipeline, like $_.Length or $_.Status.

More practical PowerShell commands using pipe are listed below FYI. 

# Get all running processes and sort them by memory usage

Get-Process | Sort-Object -Property WS -Descending


# Find specific services and display as a table

Get-Service | Where-Object {$_.Status -eq "Running"} | Format-Table -AutoSize


# List files, filter by size, export to CSV

Get-ChildItem | Where-Object {$_.Length -gt 100MB} | Export-Csv -Path "large-files.csv"


# Get stopped services and attempt to start them

Get-Service | Where-Object {$_.Status -eq "Stopped"} | Start-Service


# Find large log files older than 30 days

Get-ChildItem -Path "C:\Logs" -Filter *.log | 

    Where-Object {$_.LastWriteTime -lt (Get-Date).AddDays(-30)} |

    Where-Object {$_.Length -gt 1MB}

Tuesday, November 23, 2021

What are sections in a robot framework file?

Robot Framework and Visual Studio Code Logos

Udemy Course: Playwright TypeScript Automation Testing


In this tutorial, we will create an empty Robot Framework script that will later be used for test automation.

Robot Framework scripts are plain text files with the extension .robot. 

Each robot framework file contains a suite that can contain Tests or Tasks.


What are the sections in Robot Framework? 

Each file needs predefined sections; examples of Robot Framework sections are listed below:

  • Setting
  • Keywords
  • Test Cases

How do you define a section in a .robot file? 

The sections in a Robot Framework script are defined using a specific convention.

The Robot Framework Language Server makes our lives easier by helping us do the right things in the correct format. 

To see a practical example, Let's open the Visual Studio Code. 

Let's click Open Folder and select a folder to store our test automation or RPA Robot Framework scripts which we will create together in this course.

Robot Framework Visual Studio Code Screenshot


After opening a folder, let's create a new file to store our Robot framework automation script. 

I'll call it Section1.robot


What is the structure of a section name in Robot Framework? 

Now I'll click in the text editor and type a triple asterisk *** followed by the word settings. 

Intellisense will help us do this easily. 

*** Settings ***

A section in a robot file is defined by starting a new line with three asterisks, a whitespace, the section name, another whitespace, and three asterisks at the end of the line. 

***[space]<section name>[space]***[newline]

I'll press enter and repeat the same process for more sections, like Keywords and Test Cases.

We can also have a Variables section, but I'll explain it in the post in this series[link]. 

Now save the file by pressing Ctrl + S. I'll call it first-script.robot

(the file extension of robot script files is .robot)

This is an empty script. But still, we can use it to find whether we've done everything correctly so far. 

To run this empty script, we will click the terminal menu item and select "New Terminal." 

Over here, let's type robot space Section1, press the tab, and enter. 

The Robot Framework will tell you that the test suite defined in this file does not contain tests or tasks. 

Don't worry; we'll fill the empty sections later. 

For now, we have set up Robot Framework correctly and have already created an empty shell suite file for our use.

Next post in this series >> Next

Sunday, September 12, 2021

The Role of Browser Driver in Test automation and Downloading Google ChromeDriver to use with Selenium and Robot Framework

 The role of browser driver in test automation and downloading Chrome driver


Udemy Course: Playwright TypeScript Automation Testing

For running browser-based UI test automation on a browser, we need to have a browser installed on our PC. I got the Google Chrome browser installed. 

But we also need to install a “browser driver". 

You must be thinking, why do we need a browser driver for test automation, what does it do? 

Let me explain why. 


When we write test automation scripts in Robot Framework, our scripts utilize the Selenium library to control the actions of various web elements through the Selenium Library. 

Because a browser can be created in many different ways. There can be serious differences in what an automation software needs to do for controlling different browsers through automation. 

The creators of Selenium library can’t always stay up to date with the fine details of every supported browser all the time. 

That is why the browser makers have taken up the responsibility for providing the components or drivers needed for controlling their browsers through automation. 

These drivers conform to the industry standard web specifications(link). 

Drivers are available for most popular browsers like Google Chrome, Mozilla Firefox, and Microsoft Edge.

The driver software used to automate the Chrome browser is called Chrome Driver.

For Firefox it is called Firefox drive, and for Edge, you would’ve guessed it already. Edge Drive. 

Different versions of Chrome browser are controlled through different versions of Chrome Driver. 

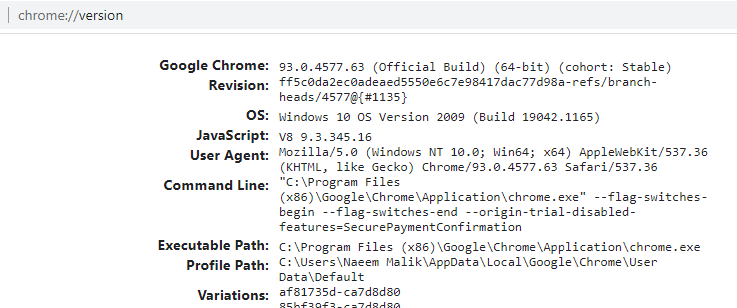
Before downloading the driver, we need to check the version of Chrome browser which is installed on your PC.

I will open the Chrome browser and click on the address bar. 

Now type chrome://version and hit enter. 


You can see which version of Chrome is installed. 

We will Download the specific driver file for the version of the browser which we have installed on our machine. 

Let’s open a new tab and search for Selenium chrome driver.


Now open the first link

Over here, I’ll click a ChromeDriver link for a suitable version of the Chrome driver(link).


Right now there are drivers for multiple versions of Chrome.

These numbers will change in the future and you should download the relevant version. 

Let me click the Chrome Driver link. 

Since I’m on Windows, I’ll download the driver for Win32. A separate x64 bit driver is not available as of now. 

Once the driver is downloaded. Let’s copy it to a separate folder. 

I’ve created a new folder on C drive and called it Chrome Drivers. 

In fact, let’s call it SeleniumDrivers instead. 

How to add ChromeDriver path to Environment Variables

We’re going to add the path of this folder to our system Environment Variables because that will make our lives easier. 

On Windows 10, I’ll click the start button and type Settings. 


Over here I’ll search for environment variables. 

I’ll select “Edit the system environment variables


Click on “Environment Variables” button

Double click  “Path” 

Click “New” and paste the path of the folder where you’ve placed the Chrome driver. 

Now close the environment variables. 

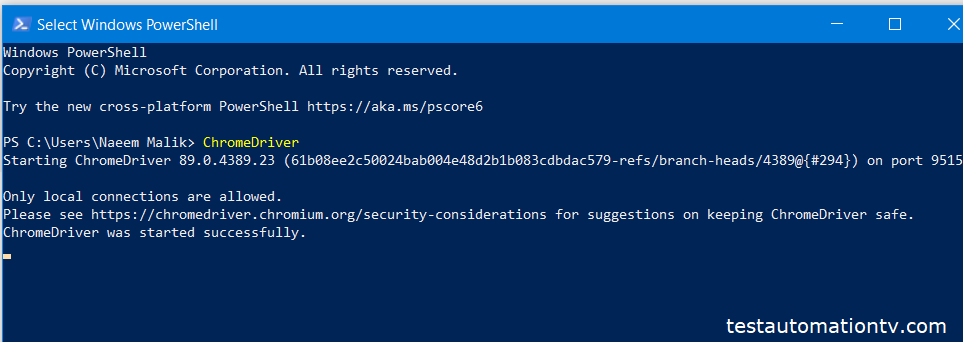
A quick way to see if you’ve configured the path correctly is by opening PowerShell and running the command “ChromeDriver”. 

You see that the console says “Chrome Driver started successfully”


Let’s close the window and proceed. 

This is the end of this article. Do check the previous articles in this series and the next one(coming soon).

All articles in Robot Framework Tutorial Series


  1. Introduction to Robot Framework, Test Automation, and RPA Tool
  2. Installing RobotFramework, RobotFrameworkSelenium, Python on your PC & updating Pip
  3. Robot Framework with VS Code and RF Language Server
  4. The role of browser driver in test automation and downloading Google ChromeDriver to use with Selenium and Robot Framework

Monday, August 16, 2021

Robot Framework with VS Code and RF Language Server

 Installing Visual Studio Code and Robot Framework Language Server 

VS Code, Robot Framework, and Python/Pip installation for test automation


Udemy Course: Playwright TypeScript Automation Testing


Robot scripts are plain text files.

You can create and edit Robot Framework scripts in any text editor like Notepad, but you might make small mistakes that could be hard to catch. Proper tools are also available to make your life easier. 

These tools are helpful especially when you’re starting afresh. 

One such tool is Visual Studio Code. VS Code is available for many platforms including Windows, Linux, and Mac.

An alternative is IntelliJ PyCharm IDE but in this tutorial, I will to show you how to setup VS Code for creating Robot Framework automation scripts. 

I’ll launch the browser and download Visual Studio Code


Let’s install it. You'll need to agree to the terms and conditions.

We'll select all options on “Select Additional Tasks”  and click Next then click Install.

I’ll checked the “Launch Visual Studio Code” option and click Finish


Visual Studio Code will open after you click the finish button.

How to Install Robot Framework Language Extension

Maximize the VS Code window and click the Extensions icon on the left side.


Search for “Robot Framework Language Server Extensions” and install it


After this search for “Python” in plugins and install the one from Microsoft. 


When the installation is finished, we’ll be good to start work with Robot Framework but there is one small pre-requisite we still have to download to run automation.

I'll show that to you in my next article.

Stay tuned. If you have any questions, please feel free to ask.

All articles in the Robot Framework Test Automation series


  1. Introduction to Robot Framework, Test Automation, and RPA Tool
  2. Installing RobotFramework, RobotFrameworkSelenium, Python on your PC & updating Pip
  3. Robot Framework with VS Code and RF Language Server
  4. The role of browser driver in test automation and downloading Google ChromeDriver to use with Selenium and Robot Framework

Thursday, August 12, 2021

Installing RobotFramework, RobotFrameworkSelenium, Python on your PC & updating Pip

 Installing Python to run Robot Framework

The Robot Framework is built using Python programming language. To use Robot Framework, you don’t need to know Python. But, you still need to have it installed on the machine where you want to develop Robot framework automation scripts or run them. 

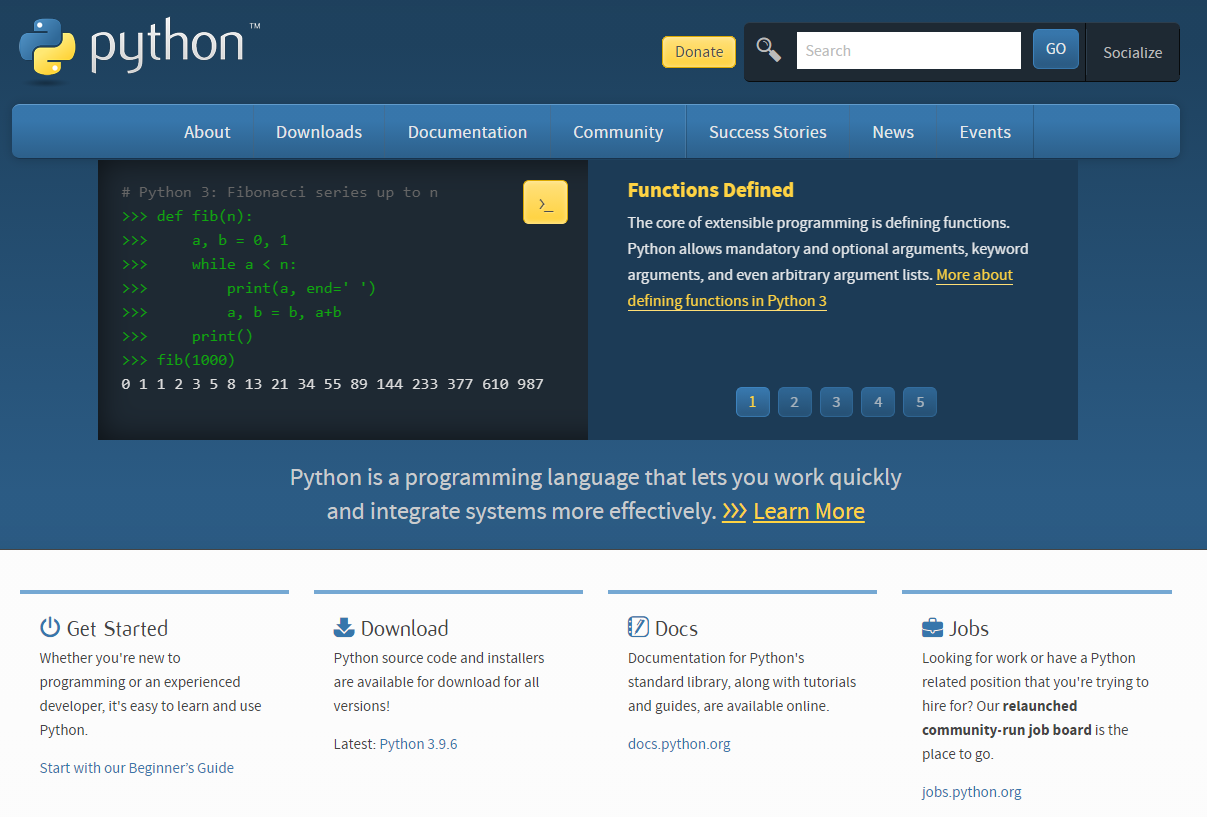
Let’s download and install the latest version of Python by visiting python.org.


Python.org - download Python

We’ll download the latest version. 

Hover the mouse over the "Downloads" menu item and select the latest version for Windows.


Many versions for a variety of platforms are available here(on Python's website). 

You can download using any browser be it Edge or Chrome.  

I planned to teach how to perform automation using Google Chrome in the course for which I wrote this material and thought to install Chrome plus the Chrome Driver later on. 

Now open the installer file. 

Do remember to click the checkbox “Add Python x.y to PATH”


It is important to note down the path where you’ve installed Python. 

Click customize installation

Click next

I am not changing anything but I just wanted you to see what are the options available. 

Click next again and click install

Once the installation is finished, I’ll click close. 

Now let’s check through Windows Powershell if we can run python from there or not. 

Having python installed correctly is necessary for running Robot Framework automation. 

I’ll click the windows button and type Powershell. I’ll click it to open it. 

Windows 10 Opening Windows Powershell


Over here, I’ll type Python space -version command to find Python version and press enter. 

Python -version 

You can see that the currently installed version. 


How to update Python Package Manager Pip

Updating Pip is a small but important detail. It is an integral part of the Python echo system but the latest version doesn’t come bundled with the setup for some reason. 

Pip is the default package manager software that comes bundled with the Python programming language. 

We are going to use Pip to install the robot framework library in our Python setup. 

It is a command-line based tool

We are going to use a command to find the current version of pip installed on our PC and whether it’s the latest and greatest or not. 

I’ll open the PowerShell

I will type the command and hit enter

pip list


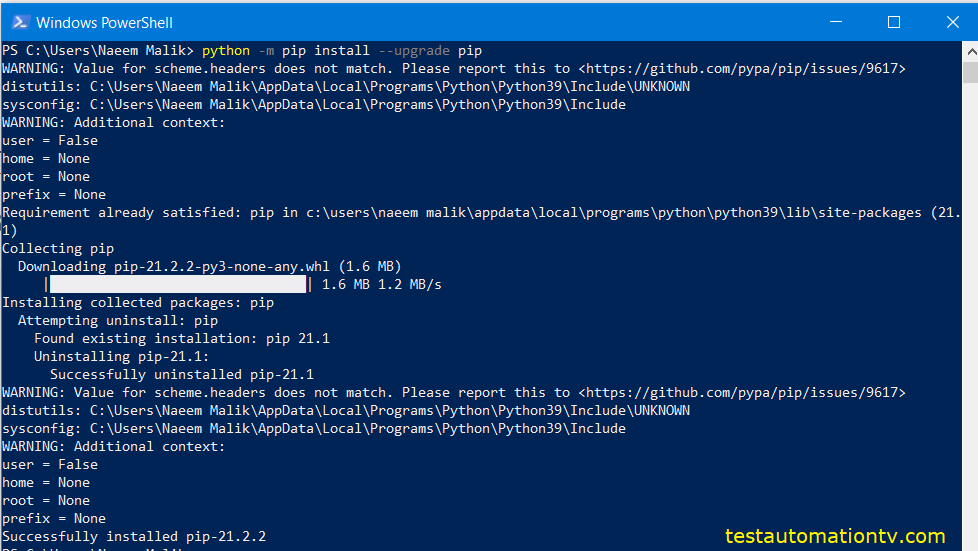
The command which is used to upgrade pip is also shown below. I’m going to type it and hit enter. 

Python -m pip install --upgrade pip

The example shows the full path of python installation but I’m using just the word Python, because we’ve added this path to our system’s path variable. 


An upgrade(of Python pip) will be downloaded and installed for you, it is a small package. 

If it gets stuck here, hit enter a few times and you’ll be done. 


Installing RobotFramework and RobotFrameworkSelenium on your PC

After installing Python and upgrading the Pip package manager, we are going to install the Robot Framework using PowerShell. 

The command is very simple, let’s type it in and press enter

Pip install robotframework

Once the command has been successfully executed, the Python installed on your PC will have all the components of Robot Framework available locally. 

Important

For performing browser automation with Selenium, we must install the robotframework-Selenium library 

Let’s do it. 

Pip install robotframework-seleniumlibrary

Once the installation is finished, we’re good to run Robot Framework scripts on this machine. 

In the next blog(and upcoming video) I'll show you how to install tools in Visual Studio Code to create Robot Framework scripts. 

All articles in the Robot Framework test automation series


  1. Introduction to Robot Framework, Test Automation, and RPA Tool
  2. Installing RobotFramework, RobotFrameworkSelenium, Python on your PC & updating Pip
  3. Robot Framework with VS Code and RF Language Server
  4. The role of browser driver in test automation and downloading Google ChromeDriver to use with Selenium and Robot Framework