 |
| Sharing a screenshot of a passed test works, in some cases. |
Maybe there was something you could send to your manager as an e-mail attachment so that s/he could sleep in peace.
Sending a screenshot of Visual Studio with Test Explorer showing it's all green after a test execution works in some cases.
Before you proceed further, please note that all of this information and much more about test automation with WinAppDriver can be learned through my course. You can sign up now with a discount by clicking the link below:
Learn automated UI testing using WinAppDriver and C#
But some managers are suspicious that maybe you came up with these results using with debugging tools. Maybe you'd been jumping around code with Ctrl + Shift + F10.
Even if you don't have a manager doubting your work, it is still a good idea to be able to run your automated testing scripts without the Visual Studio or outside the Visual Studio, without the Test Explorer window.
Generate automated test run reports:
Yet another advantage of such stand alone test automation execution is that you can produce a [automation] test run report. This report is generated in .trx format. I'm going to show you how to just that in this article.
How to run test automation from command prompt?
Please note that this is useful for both Appium WinAppDriver, Selenium, and Coded UI tests. In general, any test automation script, be it written using MsTest or Visual Studio Unit Testing Framework can be run using Visual Studio Developer Command Prompt.
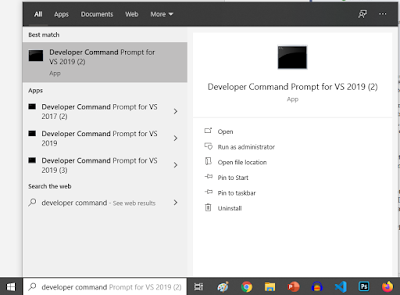
For this I'll click the Windows button and type Developer Command Prompt.
 |
| Windows: Developer Command Prompt Search |
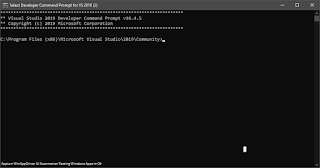
This is how Visual Studio 2019 developer command prompt looks like.
 |
| Visual Studio 2019 Developer Command Prompt Example Demo |
C:\Users\Naeem\source\repos\WinFormsUITesting\WinFormsUITesting\bin\Debug
Once you're inside the directory, type the following command
vstest.console.exe
Give a space and then put the name of the test dll file. In my case, it is WinFormsUITesting.dll.
put another space and then specify /logger:trx. Overall, the command will look as below:
vstest.console.exe WinFromsUITesting.Dll /logger:trx
After typing the command, hit the enter key. Notice that you don't need to place double quotes around the test assembly name.
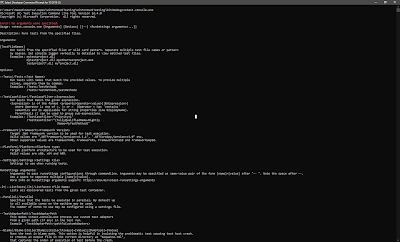
If you want to see list of all options exposed by vstest.console.exe, just type it without any parameters. A detailed help will be shown on console.
The details of all information about vstest.console.exe can be seen here.
Once the automation is finished running, the path of the generated .trx file is shown on the command line as displayed in the screenshot below.
A .trx file can be opened with any version of Visual Studio, be it community edition. It shows the results of a test run.
If you have Visual Studio installed and you double click the .trx file, it will open in Visual Studio and show test results in rows of red and green tests. A screenshot of test results in Visual Studio 2019 is displayed below FYI:
If you double click any row in the test results, more details related to that specific test method will be shown up top. A screenshot is given below FYI.
Just a reminder, all of this information and much more about test automation with WinAppDriver can be learned through my course. You can sign up now with a discount by clicking the link below:
Learn automated UI testing using WinAppDriver and C#


Great site! I really love the way it is simple on my eyes. I am thinking about how I may be told at whatever point another post has been made.
ReplyDeleteclick Here