When I created my Udemy Course about WinAppDriverUI Automation Testing in 2019, I relied solely on the WinAppDriver UI Recorder to inspect various Windows application elements. I showed how to automate. Only a little information was available on the subject back then. I recently came across another tool we can use to look into various application elements and find their attributes for UI test automation.
This post will serve as an introductory WinAppDriver tutorial. I am going to show you how to use an alternative of
WinAppDriver UI Recorder.
You can download it from the Appium.io website.
Before we proceed, please remember there are two prerequisites for using Appium Desktop.
- Enable Windows 10 Developer Mode on your PC
- You need to have WinAppDriver 1.1 or above installed on your PC.
You don't need to install Node.js to run an Appium desktop client, as shown in this WinAppDriver tutorial. Let me google the search term Appium Desktop client quickly and guide you. You also don't need to download WinAppDriver UI Recorder.
We will click the "Appium desktop for OSX, Windows, and Linux" link.
This will take us to the GitHub repository of the Appium Desktop project. You will need to download the Appium-windows.exe from here and use it to install an Appium desktop.
Please see the screenshot below.
Once you've got Appium Desktop installed, you can proceed further. We are going to start using Appium Desktop for inspecting Windows Applications. If you have the proper tools installed, please note that you can use the same utility to check apps on other Appium-supported platforms, such as Android and iOS. Although that's beyond the scope of this blog.
Running Appium Desktop Client and Connecting to a Windows Application
Before we use the Appium Desktop Client to inspect the elements of a Windows application's features, we must start the Windows Application Driver through WinAppDriver.exe.
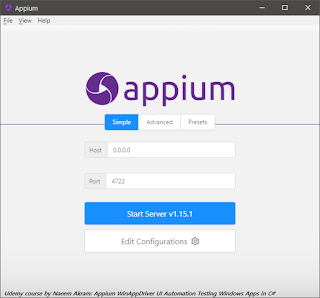
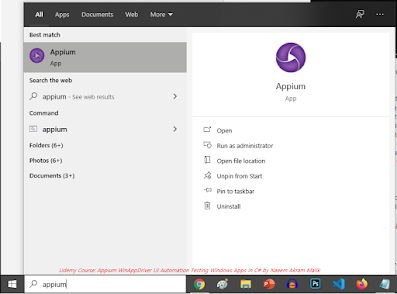
Now let's run the Appium Desktop Client; you can find it in your Windows applications. First, click the "Start" button and type Appium.
Now click the "Appium" icon to open the application. The Appium desktop client can take a few seconds to load. Then, on the main Appium UI, go to the "File" menu and select "New Session Window."
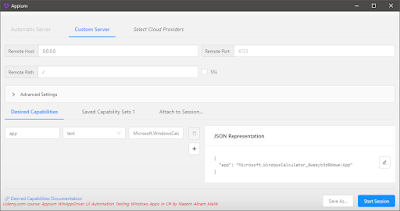
A new dialog box will open up. The tab "Custom Server" will be selected. I'll leave the remote host and remote port fields unchanged. In the Remote Path field, I'm going to put a forward slash. Then there's this table-like Ui to specify Desired Capabilities. I will click on the first text box containing the "Name." I will type the word app in there. Please note the phrase app will be small. In the value textbox, I'll paste the user mode ID of the Microsoft Windows 10 Calculator app, which is:
Microsoft.WindowsCalculator_8wekyb3d8bbwe!App
I've shown how to find this value in my course. The final screenshot of the Appium custom server is shown below. FYI:
Now Appium Client will connect the instance of WinAppDriver, which is running on this PC and listening on port number 4723. Remember, we started it earlier. I'll press the button "Start Session."
The calculator app will start, and you'll get a preview inside the Appium UI Recorder. You can hover the mouse on various application controls under the test, highlighted in yellow. In my case, the mouse cursor is also changing into a hand, but it was not captured in the screenshot.
Let's end this section here, and we will learn more about the free Appium UI Inspector
in the selection below. It is an essential tool for Appium-based automation.
Inspecting Elements Using Appium Desktop Client and WinAppDriver For Automated Testing
Once we have created a session in Appium Client, we can inspect various elements of the loaded application. The Appium Client object inspector UI is pretty simple. A button row is on the top, and "Select Elements" is clicked by default.
- We have the application preview loaded on the left side.
- "App Source" in the middle shows the hierarchy of application controls.
- The rightmost panel is "Selected Element." It will populate when we click an element.
For Example, we will hover the mouse on the application preview shown in the Appium Desktop Client.
You will see that the element under the cursor will highlight yellow. Let's click on button two in the application preview. You see, its color will change. In addition, you'll find tributes to this Windows Element will load in the right-hand pane. I've highlighted some properties/attributes (Name, AutomationId) that we can use for automation in the screenshot below.
The same thing will happen if we click the calculation results textbox on the top.
You can use the Appium desktop client to inspect Windows applications. However, other options on this screen could be more helpful. Instead, click on the given line to find out How to Download and Run WinAppDriver UI Recorder.
Oxygen IDE Support:
Please note that you can record automated UI tests using Appium Desktop Inspector to run with Oxygen IDE. You'll need to have proper tools installed for that. This includes Android Studio, which is overhead, but so far, that's the way Oxygen IDE architecture is, and they don't have any plans to remove the dependency anytime soon. You can find more by visiting this link.
You can now play with the inspector further to see more options. I am going to close it now. In the following video, I'll show you how to use the app arguments desired capability in Appium Desktop Client.
app arguments Specifying Additional Desired Capabilities in
Appium Desktop Client
How to use appArguments AppiumOption/DesiredCapability in Appium?
We can specify more additional capabilities using the Appium Desktop Client. These capabilities can have various effects on our tests and are something not available in WinAppDriver UI Recorder. For Example, if we want to open Notepad with a file loaded into it already. Please note that you can't do the same thing in WinAppDriver UI Recorder software.
Click on the link to find out "How to Download and Run WinAppDriver UI Recorder."
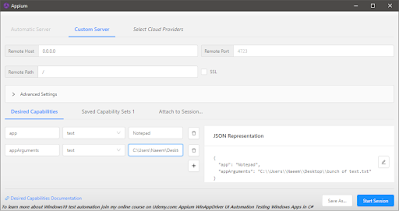
Let us create a new session. In the app's default capability, I'll put "Notepad." Then I'll click the plus sign and add app arguments in the desired skills. Finally, I'll put the file's path we want to open in the value field.
For Example, in my case, C:\Users\Naeem\Desktop\bunch of text.txt. Please note that we won't put double quotes around the path. The final screenshot of our new Appium client custom server to launch Windows 10 Notepad with a file opened inside of it is given below:
I'll click the "Start Session" button. You'll see that the file you specified as a parameter will open.
If you're doing Microsoft Excel automation, Microsoft Excel can use the same technique to open a file right out of the gates. You may need to test an Excel plugin with test automation using WinAppDriver(Free automation tool).
Click on the link to find out "How to Download and Run WinAppDriver UI Recorder."
It is also possible to open files in Microsoft Excel launched through WinAppDriver using appArguments Appium Option.
Specify the desired capabilities in your test automation code will be done through the method call listed below:
AppiumOptions.AddAdditionalCapability("appArguments", "c:\textfile.txt");
AppiumOptions.AddAdditionalCapability("ms:waitForAppLaunch", "50");
ms:waitForAppLaunch Handling Splash Screen in WinAppDriver
How to wait for an application splash screen to display? For Example, how to use ms:waitForAppLaunch AppiumOption?
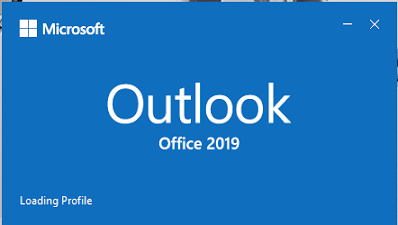
Some applications show a splash screen when they launch. Unfortunately, the splash is mistakenly considered the main application window by the WinAppDriver, leading to automation failure.
If you're using WinAppDriver 1.2 RC, you can also make the WinAppDriver wait a bit so that the splash goes away, and then the WinAppDriver attaches to the application window.
For Example, let's try a demo with Microsoft Outlook(2019), a Desktop e-mail client application.
A free code sample of Outlook 2019 automation using WinAppDriver can be found in your GitHub repository. I am going to launch it straightforwardly. Then, I'll create a new session window and put Outlook against the "app" in desired capabilities.
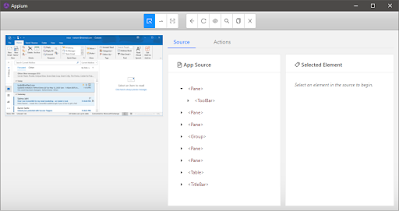
You'll see that the app preview will not load. The progress animation will keep spinning. Let's close the session window and come again. This time, I'm going to add a new Desired Capability. In the name field, I'll put ms:waitForAppLaunch in the value field, I'll put the number 15.
This time, you'll see that the application preview will take a while to load in the Appium Desktop Client. This is because now you can check all Windows elements' properties inside this application.
This is the end of this article, and I hope you found it helpful. Please feel free to ask questions.
Do share it in your social circles as well. Please also visit my Udemy course; the link is given AppiumWinAppDriver UI Automation Testing.








azure online course
ReplyDeletejava online course
salesforce online course
hadoop online course
Data Science online course
linux online course
I really liked reading your post! Very high quality content and useful information similar to my post on places to visit to With such a valuable website I believe you deserve to be ranking even higher in the search engines.
ReplyDeleteclick Here